
How Seamless Gutter Installation Works: Expert Step-by-Step Guide for Estero Homes
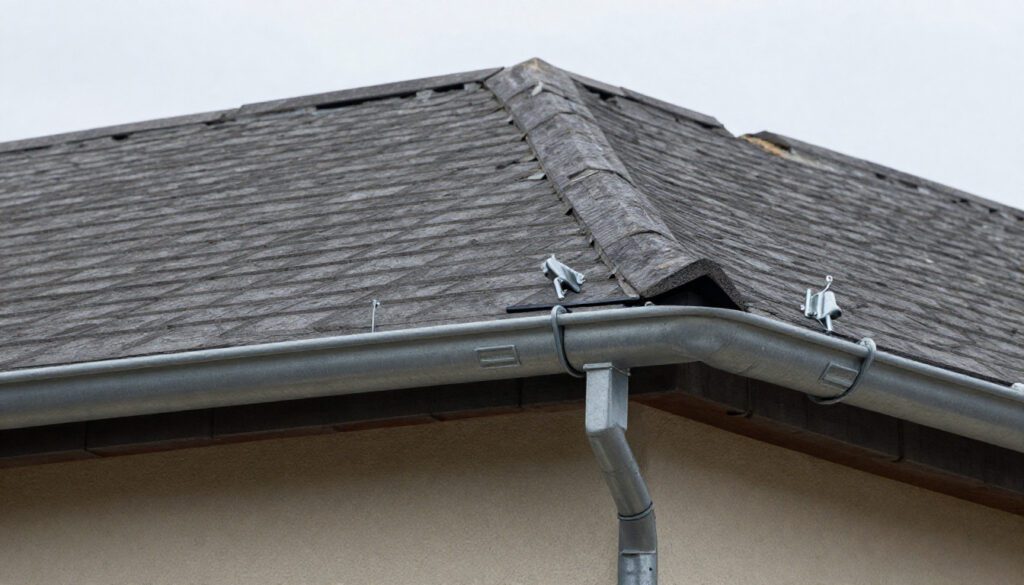
Usually, Estero homeowners ignore their gutters until a problem arises. A waterfall spilling over the front door during a storm or the basement emitting a damp smell are often the first indications that your water management system has leaked. By the time you decide to replace that system, seamless gutters are very much regarded as the best option in terms of durability and looks.
So what exactly goes down in the smooth gutter installation process?
This guide will show you the professional step-by-step method of seamless gutter installation in Estero, making it clear to you how these systems operate and why they are a wise investment for your house.
Step 1: Initial Inspection and Planning
Behind every successful remodeling is a plan. In fact, it is very important to first understand exactly what your home needs are.
Assessing the Current Gutters
The estimator inspects the existing gutters for any sagging, damaged fascia, and the location of the downspouts. Spotting potential problems upfront will guarantee that the structure remains sound before designing a new system.
Besides, measuring each edge of the roof is essential to installers since seamless gutters are made by one continuous extrusion.
Assessing Water Flow Requirements
The size of your gutters will depend on the square footage and slope of the roof:
- 5-Inch Gutters: Standard for most homes.
- 6-Inch Gutters: For bigger roofs, roofs with steep slopes, or areas with a lot of rainfall.
Selecting Color and Material
You will be the one deciding the color and material that will be the best match for your house. Usually, materials consist of aluminum (the most popular one), copper, or steel.
Not sure what you need for your home? The Gutters Unlimited Plus team can help you explore our gutter installation services to identify the ones that will fit your look and budget best.
Step 2: Old Gutter Removal and Site Preparation
Once the plan has been established and the quote is approved, the installation team will show up. Removing the old system is usually the first thing on their agenda.
Precise Gutter Removal
Taking old gutters off is not only about pulling them away from the house. It means being careful not to harm roof shingles, the drip edge, or the siding. The crew will disassemble the hangers and gently drop the old segments to the ground.
Fascia and Soffit Inspection
Now, the time has come to reveal the truth. The old gutters are taken down, and the whole fascia board is exposed. Last of the day, the technician will do their final investigations for any rot, mold, or defects giving out signs.
- Minor Repairs: Occasionally, a minor wood section calls for replacement or strengthening.
- Major Rot: If there is a lot of damage found, the work may stop for a short time while the fascia board is replaced. A strong nailing surface for the new system is very important.
Ensuring Proper Drip Edge Placement
A drip edge is a metal strip usually placed underneath the shingles with a part slightly sticking out of the roof. The method simply channels the rainwater to the gutter instead of spilling it beforehand.
In case the existing drip edge is torn or taken away; water can seep under shingles or into gutter areas. It causes the fascia to undergo decay. Before getting started with the installation, installers recheck where the drip edge should be placed.
Step 3: On-Site Seamless Gutter Fabrication
This step is really the game-changer for seamless gutter installation in Estero when compared with the traditional methods. Instead of a truck loaded with slices of 10-ft sections, the team would only bring along a special machine trailer.
The Gutter Machine
The main feature inside the truck or trailer is a portable roll-forming machine. It contains a giant flat metal coil (usually aluminum), which is wrapped in the color of your choice.
- Feeding the Coil: The machine is fed with flat metal at one end.
- Roll Forming: While the metal moves through a number of rollers, it is bent and given the shape of the gutter profile (usually the “K-style” profile).
- Custom Lengths: The machine keeps on producing the gutter until it reaches the exact length that matches the piece of your roof that is being worked on.
- Cutting: After the exact measurement is taken, the installer grabs a guillotine-style cutter and uses it to cleanly slice the gutter.
Step 4: Hardware and Hanger Installation
Before literally putting the gutter on the house, a prep has to be conducted while the gutter is on the ground. The preparation has its parts: one is to fit the end caps, and the other is to make the outlet holes for the downspouts.
Hidden Hangers for a Sleek Look
Gutter installation professionals use hidden hangers for the job. These brackets fit inside the gutter and are fastened to the fascia board with heavy-duty screws.
- Strength: Screws are holding much better than nails, and they are resisting pulling out over time.
- Aesthetics: Since the hangers are located inside the gutter, they cannot be seen from the street, giving a very neat appearance.
- Spacing: Installers set up these hangers at 18 to 24-inch intervals so that the gutter has enough strength to hold heavy water, wet leaves, or snow.
Step 5: Installing Gutters and Ensuring Proper Pitch
This is the main technical part of the installation. To the naked eye, gutters look like they are hung perfectly straight and level with the roofline. However, if a gutter is perfectly level, water will just sit in it.
Slope Calculation
Allowing your gutters to be angled very slightly, hardly noticeable, towards downspouts is the right thing to do if you plan to rely on gravity for water draining. Usually, the accepted norm in the industry is a fall of approximately 1/4 inch per 10-foot length of gutter.
- Too Much Slope: The gutter appears to be tilted and visually unappealing.
- Too Little Slope: Water pooling in the gutter results in mosquitoes breeding, the metal corroding, and the gutter overflowing during heavy rain.
Gutter Corner Connections
Most roofs have corners, so their long seamless runs need to be joined.
- Box Miters: Prefabricated corners into which the gutters slide.
- Strip Miters: One more personalized method entails cutting the gutter at a 45-degree angle and placing a narrow aluminum strip over the joint.
- Hand-Cut Miters: The best installers can remove the metal tabs and fold them so that a corner is formed with a single seam only.
Regardless of the installation method, the corner seams should be thoroughly sealed using a top-quality, UV-resistant gutter sealant to stop leaks. In fact, this is the only area on a seamless system where leaks can occur; hence, professional sealing is essential.
Step 6: Downspout Installation
The gutters aim at collecting the rainwater, but it is the downspouts that actually take the water to other places. Ideally, one would put downspouts in the corners of the house or very discreet spots. The idea is to lead water away from the spots where people move (like paths) and important garden elements.
Installing Downspout Elbows and Extensions
Generally, downspouts don’t just go straight down vertically from the gutter to the ground. They need to find a path under the roof overhang (the soffit).
- Top Elbows: Two elbow joints and a small piece of downspout pipe serve to make the water flow from the gutter outlet back to the house wall.
- Strapping: Downspouts are secured to the siding or bricks using metal straps. These straps hold the downspout tightly so the pipe won’t cause any noise or get detached during a storm.
- Bottom Elbow: The water is redirected outward from the foundation at the bottom by an elbow.
Directing Water Away from the Foundation
The job of installing gutters does not end until the water is directed away from the house. Pouring water at the very foundation of the house can lead to a basement leaking and the house settling structurally. Installers use splash blocks or downspout extensions to guarantee that water is released at a distance of 3 to 5 feet minimum from the house.
Step 7: Adding Gutter Protection (Optional but Recommended)
Many Estero homeowners, even if this is not a strict necessity for them, greatly benefit from installing the gutter trough and in fact most of them put up gutter guards or leaf protection systems almost simultaneously with the main installation.
It is generally cheaper and simpler to install gutter guards when you install seamless gutters in the first place than to add them later on. Gutter guards, screens, hoods, or mesh inserts help keep the gutter free from leaves, pine needles, and twigs that would otherwise clog it. They still let water pass through. So, there is usually less effort required, and the system works without any interruptions all year round.
Step 8: Sealing and Final Inspection
Once everything has been hung, screwed in, and strapped down, the crew conducts a last quality control check.
Applying Sealant to Ends and Outlets
Every end cap (the piece that closes off the end of a gutter run) plus every outlet (where the water drops into the downspout) is required to be sealed. Installers employ a special mastic that remains flexible. As the metal expands and contracts due to temperature changes, it won’t crack.
Gutter Cleaning
When you put in new gutters, you end up with plenty of scrap pieces such as metal shavings, screws, and tiny caulk scraps. The team that did the job should definitely sweeping or blowing, on the gutters, so that it looks perfect and prepared for that first rain, without even a small speck left.
The Water Test
Sometimes, water testing is conducted by the installers by using a hose to see if the water is flowing correctly to the downspouts and there are no leaks at the corners.
Also, they observe whether water is not pooled somewhere in the middle of the run and thus make sure that the pitch was laid out correctly.
Step 9: Final Site Cleanup
A legit professional job site even looks cleaner after the team leaves than before they arrived. Gutter installation is one of those waste-producing processes, i.e., old gutters, sharp metal scraps, and packaging.
The crew will:
- Take the old gutters and place them in the truck for recycling.
- Use sweepers to gather any screws or nails that have fallen on your driveway or lawn (very important to keep your tires and feet safe!).
- Use a blower to clean walkways and driveways of aluminum dust particles.
Gutters Unlimited Plus is one of the companies that truly respects your property. Like our own Estero homes, we treat and care for yours while getting a thorough cleanup done.
For a deeper dive, check out our guide on Seamless vs. Traditional Gutters: What Your Naples Customers Need to Know.
Professional Gutter Installation vs. DIY: Why Experts Win
However, after going through all these instructions in depth, you might wonder whether you can do this on your own. Yes, it is possible for someone to purchase the vinyl gutters separately and try to stick them all together; however, it is extremely messy. A truly seamless gutter installation in Estero is really a professional kind of job, since it needs special machinery, and that part just isn’t easy to improvise.
Besides just having the right equipment, skill is what really counts.
- Safety: Handling gutter pieces often means standing on ladders quite high up. Experts, however, come prepared with the training and safety equipment to do it safely.
- Structural Integrity: Gutters that are not properly hung may cause damage to the fascia boards or result in the formation of ice dams.
- Water Management: The wrong pitch or downspout location can cause water to collect at the foundation.
- Warranty: Professional installations and GTU carry a warranty that covers materials and labor. A regular cleaning or a DIY job doesn’t have a warranty.
Final Words: A Gutter System Built to Last
Gutter installation is a fusion of knowledge in construction and art. You need to be familiar with how water moves, the weight a structure can bear, and design beauty.
Well-installed gutters are like a home’s hidden armor that redirects thousands of gallons of water each year from the foundation without causing any concerns to the homeowner.
Ready to Upgrade Your Home’s Protection?
With leaking, sagging, or unattractive gutters, do not wait until there is damage done due to the weather. Be sure to take advantage of having a professionally installed gutter system.
Here at Gutters Unlimited Plus, our experienced team members would love to check your Estero house and propose a customized seamless solution if you wish that will satisfy both your needs and desires. Contact us today to set up your free quotation and take the first step towards a drier and safer home!
Frequently Asked Questions
How do seamless gutters handle heavy rain?
Fewer joints means fewer weak points where leaks can appear, so the risk of water running into the vulnerable areas is less. Besides, seamless gutters can direct water smoothly to minimize the possibility of overflow during heavy rainfall.
How long do aluminum seamless gutters last in Estero?
Aluminum seamless gutters installed and maintained properly in Estero’s weather can last 20 to 30 years. Keeping them clean and checking them regularly can also make them last longer.
Do you install gutter guards?
Yes, we install top-notch gutter guards that are specifically designed to keep leaves and other debris out, thereby helping reduce cleaning and prevent clogging.
How do seamless gutters look?
Seamless gutters are also known as continuous gutters as they are made without seams. The manufacturer bends one continuous piece of a section of a gutter along the length and shape of the roof’s edge to make seamless gutters.

Gutters Unlimited Plus is locally owned and operated, serving the Southwest Florida region. All our work is supported by our fleet of company trucks to support our diverse customer needs.